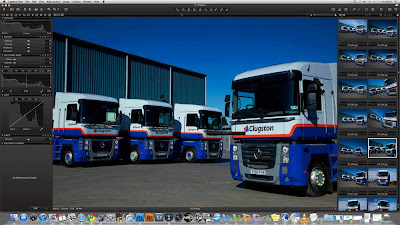
I had a really good friend of mine on the phone a few nights ago to wish me happy birthday. During the long conversation he mentioned the fact he’d almost become a slave to Photoshop - spending hours trying to match colours, contrast, saturation, etc. This is seldom the case at Chez Cunningham. Now I know we’ve all seen the guru people dragging RAW images straight into Photoshop, but they’re only ever dragging one, not 101. In my opinion, trying to match a large set of images one by one is verging on the impossible.
For those of you with similar issues, here’s what happens here (in its entirety):-
RAW. Select RAW on the camera. JPEG will just compress. With RAW you’ve got a default image of the highest possible quality.
Temperature. Dial in a colour temperature. In most conditions out cameras are set at a manual colour temperature of 5000K. In some cases we use one of the program modes (such as direct sunlight).
Manual. Shoot in manual exposure mode. Using Av and Tv can result in a massive shift in exposure (especially with stray sunlight). If in doubt, use a light meter.
Grey card. If you’re working across an entire day (from dawn to dusk), shoot at least three grey card images.
Shoot the job.
Assign. Once back in the studio, empty the RAW images into a new folder.
Software. Load the whole lot into Capture One Pro 6 software. Now you’re looking at each and every image in a tiled, thumbnail format (not singly). Tweak the colour temperature, tint, exposure, etc. back to where you want it (remember we’re set to manual 5000K), then apply across the batches of images you want to change. Make sure you’ve saved the changes.
Edit. Edit the set down, deleting unwanted images.
Batch Process. Select all, assign a new file name, embed metadata and batch process to JPEG. You should now have two folders: RAW (default) and JPEG (to be worked on).
Ps. Open each of the final JPEG selection in Photoshop. Check for dust and apply sharpening or other small tweaks if necessary.
It’s a rap. Close and save. Done.
This process should give you a set of images pretty damn close to each other. If you’re attempting multilayered shots (e.g. when using lighting), manual exposure and colour temperature will save you hours in post production.
No comments:
Post a Comment